3
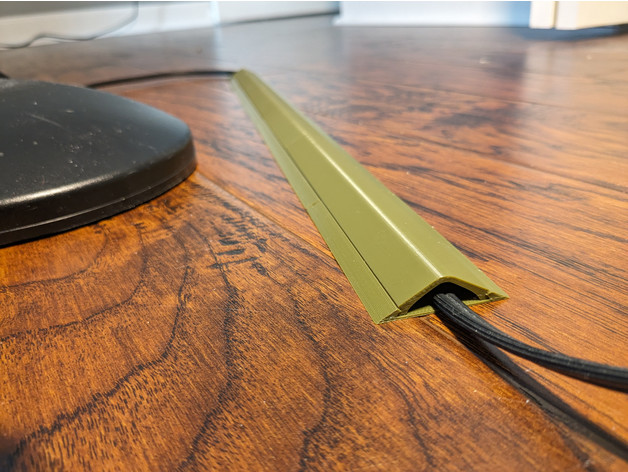
Compact Cord Cover for hard floor by p1mrx
www.thingiverse.comThe goal of this project is to design a cover for an 8mm⌀ extension cord at my makerspace, strong enough to walk on, at minimum cost. The parts assemble to form a rigid triangle, with the top in compression and the base in tension.
Filament usage: 170 g/m (52 g/ft)
Filament cost at $20/kg PLA: $3.40/m ($1.04/ft)
The STL files contain 100mm extrusions; you should scale them to the desired length.
For example, to span a distance of 1080 mm, you could print the following:
cord_cover_top_3x.stl, scaled to Z=180%, 3×2 copies: 180×3×2 = 1080 mm
cord_cover_base.stl, scaled to Y=180%, 5 copies: 180×5 = 900 mm
cord_cover_base.stl, scaled to Y=90%, 2 copies: 90×2 = 180 mm
When assembling, stagger the top and base parts like bricks, with 50% overlap. The final base (would be #6 in this example) is split in half and positioned at the ends.
The top_1x and top_3x STLs are equivalent, but top_3x is theoretically less wobbly because the 3 parts can support each other.
I recommend printing 20mm extrusions first, for quality/strength testing:
cord_cover_top_1x.stl, scaled to Z=20%
cord_cover_base.stl, scaled to Y=20%
PrusaSlicer settings for 'top':
Scale in the Z direction
0.2 mm layer height
1 wall
99% honeycomb infill (solid, with lines pointing in 3 directions for diversity)
0 top layers (let the infill handle it)
1 bottom layer (to help align with the raft)
3-layer raft with 0.15 mm Z distance (bed adhesion is important)
Seam position: Random (print the horizontal stitches in both directions)
No support
PrusaSlicer settings for 'base':
Scale in the Y direction
0.2 mm layer height
2 walls
100% rectilinear infill
0 top/bottom layers (let the infill handle it)
No raft (the base is a huge rectangle)
No support
The "8mm" STLs have 8.1mm⌀ of internal clearance. I haven't built STLs for other diameters, but they can be made in Fusion 360: Modify > Change Parameters > (wire_diameter, top_thick, extrusion_length)
Longprint is loooooooooong.
You must log in or # to comment.

