Uh, I always thought it was ambiguous who did it in the end, because it doesn’t matter for Fallout.
- 6 Posts
- 23 Comments
 2·1 day ago
I definitely wouldn’t say master, but I’m competent at lighting.
But we have Lemmy, the Fediverse, qBitTorrent, Tor, I2P, GrapheneOS and the Armada of GNU/Linux distros. Look at Android, as long as something is FOSS, someone will take the rubbish out and make something usable, not only GrapheneOS, but CalyxOS, DivestOS, eOS and whatnot. The internet is pretty good, if you know what to look for and where to ask.
We don’t talk about the lizard episode. And Tuvix.
If you mean that’s how machine learning image generation works, well, it’s worse. The companies creating these programmes know exactly where they’re taking it from. They deliberately ignore licensing, example: the GPL. Then they basically create an elaborate spreadsheet and tell the media it’s alive or some nonsense. And in comes the capital.
 2·8 days ago
Nice grade man.
“Супер сус”. Channel name is in Cyrillic.
I’ll keep that in mind next time, thanks.
I like it way more than the original. Yes, the background’s darker, but the heron is the correct exposure. And only the heron, so you have a point where the eye is drawn to. I think with one of the presets in the article it would be even better.
Well, Darktable by default gives you a proper looking input without having to do anything. It will look boring, but right. So there’s nothing you need to do to make it look like a normal picture. Also, if you want, there are manufacturer-specific presets directly built in, which make it look a bit nicer.
Also you can use 3D LUTs files. They are essentially like program agnostic styles. Be sure to set the colour space properly to the colour space of the LUT when you use them, however.
Here’s an article with a download link that gives you a few very high quality ones. They’re all strictly scene-referred, not display-referred like the other programmes, so they are consistent across pictures.
https://onecameraonelens.com/2022/10/13/a-selection-of-darktable-styles/
Also, if you want to do white balance with Darktable, do not do it with the white balance module, but with the color calibration module. The white balance module does something very different in a scene referred process.
Lastly, I highly recommend you also do your own ones because it’s fun and it will make your pictures look unique, since it will be your own unique creative colour grade.
If you have any questions, DM me.
Edit: Fixed typo.
 2·11 days ago
Communities thrive on fresh content. I’m doing my part! Do your part too, citizen! Would you like to know more?
Personally, I found Darktable to be the by far best raw editor I’ve ever used, and I used quite a few.
I used to think, that digital editing was hard and that I was quite bad at it until I tried Darktable. Darktable is easier and it gives you more consistent and predictable results than any other raw editor. Reason is that other raw editors basically just try to make it look good on the screen and then apply any transformations on top of the “good-looking” copy (Display-Referred workflow), which leads to unpredictable results. I can speak from experience when I say Darktable saves me countless hours in my job. Software really makes a massive difference in your photos and workflow and Darktable’s FOSS. So no harm in trying. Yes, I’m shilling Darktable hard because it is so good. Believe me, if you ever had to do any sort of advanced editing in Lightroom or Capture One, you know what I’m talking about when you try twisting the programme’s arm into giving you something acceptable and then trying making it look consistent with other pictures.
Best example is highlight recovery. Most programmes don’t do real highlight recovery. They just give you back what the camera has already recorded, but have deliberately thrown away to give you a good looking copy right when you load the image the first time. Thanks to applying a curve first, and then everything else on top of said base curve. So if you continue to multiply on top of other transformations, you’ll essentially multiply more and more errors, and it will really show.
For starting out, stick to the predefined workflow and modules and work away. There’s your active modules and then you can add more modules to your active ones. There is a basic workflow when you load every image that gives you a good-looking result, but thanks to everything being exposed to you, the user, you have full control of all of it. Each module completes processing and hands off the result to the next module from bottom to top. So you always know what is going on in your raw workflow and in what order, which is very important. Funnily enough, other raw editors mostly don’t tell you what’s happening in what order, so you kind of have to make a guess, and just try and see what you get. It doesn’t have to be this way, it can be better. If you want to go really deeply into raw editing, read the excellent manual. But if you just want to keep it surface level, that’s alright as well. Just stick to the predefined modules and their order and you’ll be golden.
TLDR: Darktable good.
Edit: Fixed typo.
“What a great day of 1841 in Ireland.”
Phytophthora infestans:
 4·12 days ago
Buttery smooth. I reckon yours is the 1000/11?
 11·12 days ago
That’s not a deliberate effect. This is just how the Reflex Nikkor 500/8 renders bokeh. The mirror inside the lens is essentially doughnut shaped and reflects the image back into itself. So technically speaking, there is a massive gaping hole in the middle of the lens. This is why you see the ring effect in the out-of-focus blur.
Edit: Corrected a Typo.
 2·13 days ago
Try Gregory Crewdson. I’m unsure about the genre though.
Fujifilm XH1, bargain bin price and professional quality. And if I had to glue one lens onto it, it would be the 16-80mm OIS. This zoom lens is astonishingly good, it renders just like a bad prime lens, and this is high praise.
I read a Wikibooks article about photography equipment some time ago, so in case you find it helpful:
https://en.m.wikibooks.org/wiki/Photography_Equipment/What_should_I_get%3F
Edit: I forgot to mention that this lens can also be used as a pseudo-macro lens.
 1·13 days ago
Well, again, for home use it will be sufficient. A4 size is the maximum in my opinion. If you want to go bigger than that, you need a proper camera. Phones aren’t made for professional applications, they’re made for just quickly taking pictures of things that you may find interesting or just take selfies with your family and for that they’re perfect. There are in your pocket when you need them and you don’t need to fiddle around with settings.
If you want to do something more advanced like colour grading in Darktable, you need to do a bit more to make usable raw files for that application. Downlaod OpenCamera, set it to RAW and standard, Set exposure-bracketing-pictures to 5 and exposure-bracketing-stops to 3. Make sure Camera2 API is selected in the main options menu for this to show up. Then in Darktable you can merge the five photos you have to one big one and you’ll have a surprisingly capable raw file. Just to be clear, you don’t need to do this if you just want to take quick pictures that look fine. This is just for something more advanced, if you’d like to color grade and post-process your photos in general.
Edit: fixed typo.
 1·13 days ago
If you’re taking selfies exclusively and only want to share them to other people’s phones, definitely not. You won’t be able to enjoy the quality of your new camera on a screen this small and you’ll also need the extreme wide angle that phones usually have. Buy a new phone, it is more than sufficient for that application. Also, if you’re living in the EU, starting February 18th, 2027, batteries will be replaceable again, so you should wait for that, if you can.
If you want to enter the hobby or the profession of photography, the answer would be different. But if it is, again, just for phones, phone cameras are perfectly sufficient for that.

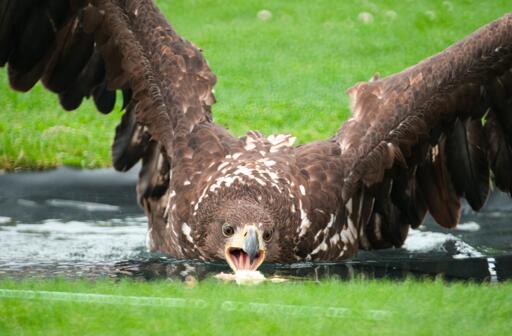

My Personal Workflow
You’re not seeing the edits you do in Darktable in Digicam because Digicam is a library application. You take a finished JPEG there and it will sort it by tags or things it sees in the image through machine vision, etc. Digicam cannot read the instructions Darktable gives in its sidecar “.xmp” files. Export from Darktable to JPEGs and put it into your Digicam folder. Then it will work out.
Edit: Fixed typo.